
Cold brew coffee has surged in popularity for its smooth, less acidic profile that delivers rich flavor without the bitterness of hot-brewed coffee. The Ninja Cold Brew Coffee Maker revolutionizes this process, transforming what traditionally required 24 hours of waiting into a streamlined, reliable system perfect for home use. If you’ve ever wondered why your cold brew lacks depth or clarity, mastering your Ninja machine could be the solution. This guide cuts through the confusion to deliver precise, actionable steps that guarantee café-quality cold brew from your kitchen—no barista skills required.
Ninja Cold Brew Coffee Maker Components Breakdown

Understanding your appliance’s anatomy prevents common user errors that compromise brew quality. Your Ninja Cold Brew Coffee Maker consists of three critical components that work in concert: the main carafe, filter basket, and brew basket attachment. The glass carafe features measurement markings for precise water levels and doubles as your serving vessel. Inside it sits the stainless steel filter basket with its specialized fine-mesh design that prevents sediment while allowing optimal extraction. The brew basket attachment creates the immersion environment by holding grounds above the water level until you’re ready to brew.
The flavor selector dial represents Ninja’s innovation—this simple twist mechanism alters the brewing dynamics between regular (ready-to-drink) and rich (concentrate) settings. Many users overlook how this dial controls water distribution, resulting in inconsistent strength. When properly engaged, the dial ensures complete saturation of grounds for even extraction. Recognizing how these components interlock prevents the most frequent assembly mistakes that lead to weak or cloudy brews.
Coffee Selection and Preparation Protocol

Your cold brew’s quality begins long before pressing start—coffee bean selection and preparation determine 70% of your final result. Choose medium to dark roast beans specifically labeled for cold brew or traditional espresso blends, as their oil content and roast profile yield optimal extraction during the extended steeping process. Whole beans maintain freshness for up to two weeks after roasting, while pre-ground coffee loses 60% of its volatile compounds within 24 hours.
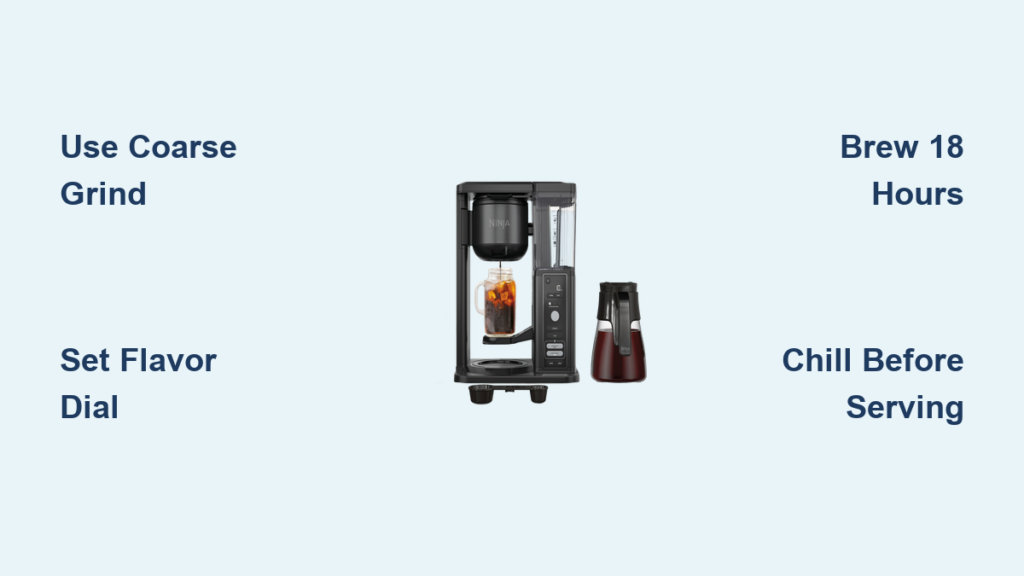
Grind size proves critical—use a burr grinder on coarsest setting to achieve consistency resembling sea salt. Blade grinders create inconsistent particle sizes that lead to over-extraction of fines and under-extraction of larger chunks. Measure precisely using the 1:4 coffee-to-water ratio for regular strength or 1:2 for concentrate—this translates to 4 ounces of coffee per 16 ounces of water. Scooping grounds directly into the filter basket without leveling creates channeling, where water follows paths of least resistance, resulting in uneven extraction.
Step-by-Step Brewing Sequence
Follow this exact sequence for flawless cold brew every time: First, place the empty filter basket inside the carafe and add your measured coffee grounds, distributing them evenly with a spoon to prevent clumping. Pour cold filtered water slowly down the carafe sides to avoid disturbing the grounds, filling to the appropriate line (16 oz for regular, 8 oz for rich). The water must completely submerge the grounds for proper extraction—any dry spots indicate insufficient water.
Secure the brew basket lid with firm pressure until you hear a click, verifying the seal by gently twisting the lid—it shouldn’t move. Rotate the flavor selector dial to your desired setting, noting that the rich position creates a more concentrated brew by reducing water volume while maintaining coffee quantity. Place the assembled unit in your refrigerator’s center (not the door) where temperature remains most stable, and set a timer for 18 hours—the sweet spot between under-extracted sourness and over-extracted bitterness.
Time and Strength Optimization Guide
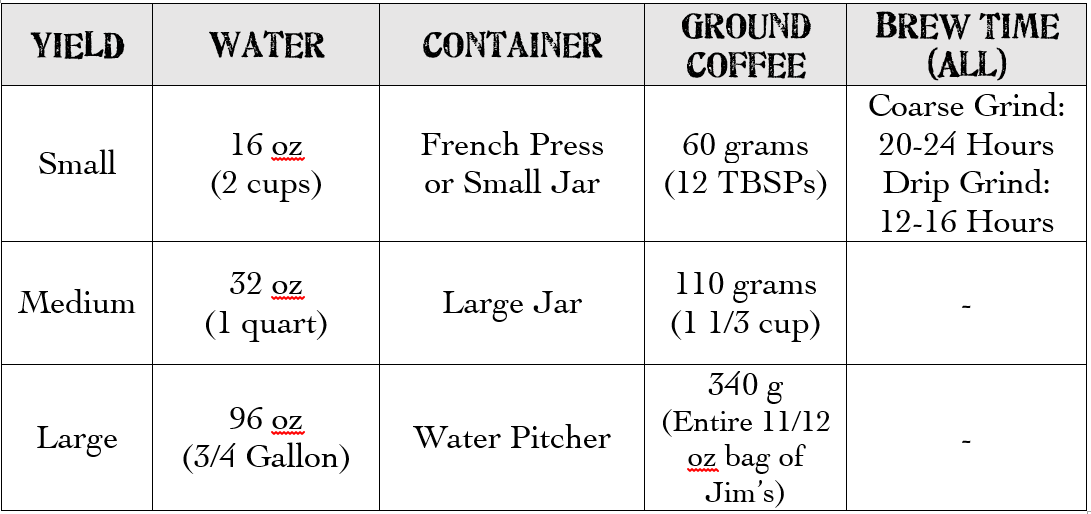
Brew duration dramatically impacts flavor development—12 hours yields a bright, tea-like cold brew suitable for delicate single-origin beans, while 24 hours produces a syrupy concentrate ideal for bold espresso blends. The optimal 18-hour window balances acidity reduction with flavor preservation for most commercial blends. Temperature matters equally: refrigerators maintaining 34-38°F (1-3°C) extract cleaner flavors than warmer units, as higher temperatures accelerate extraction and increase bitterness.
When selecting strength settings, consider your intended use. The rich setting creates a 2:1 concentrate perfect for nitro cold brew or mixed drinks, while regular strength delivers ready-to-drink coffee. Many users err by diluting rich brew with equal parts water—the proper ratio is 1 part concentrate to 2-3 parts liquid. Track your experiments in a brewing journal, noting how Ethiopian Yirgacheffe develops floral notes at 14 hours but becomes medicinal at 22 hours, while Sumatran Mandheling peaks at 20 hours with chocolate notes.
Serving Techniques That Elevate Flavor
Professional presentation transforms good cold brew into an exceptional experience. Chill your serving glasses for 10 minutes before pouring to maintain optimal drinking temperature. Use large, slow-melting ice cubes made from filtered water to prevent rapid dilution—small cubes melt 3x faster, watering down your carefully crafted brew. For the smoothest texture, pour through a secondary paper filter to capture any micro-fines that passed through the Ninja’s mesh.
Customize your drink with precision: add sweeteners to the glass before pouring to ensure even distribution, using 1/2 teaspoon of simple syrup per 8-ounce serving as a starting point. Whole milk creates the creamiest mouthfeel, but oat milk produces the most stable foam for layered drinks. Never add hot ingredients to cold brew—this creates condensation that dilutes your drink. For specialty beverages, try a 3:1 cold brew to tonic water ratio with a twist of orange peel for a refreshing coffee spritz.
Troubleshooting Cloudy or Weak Brews
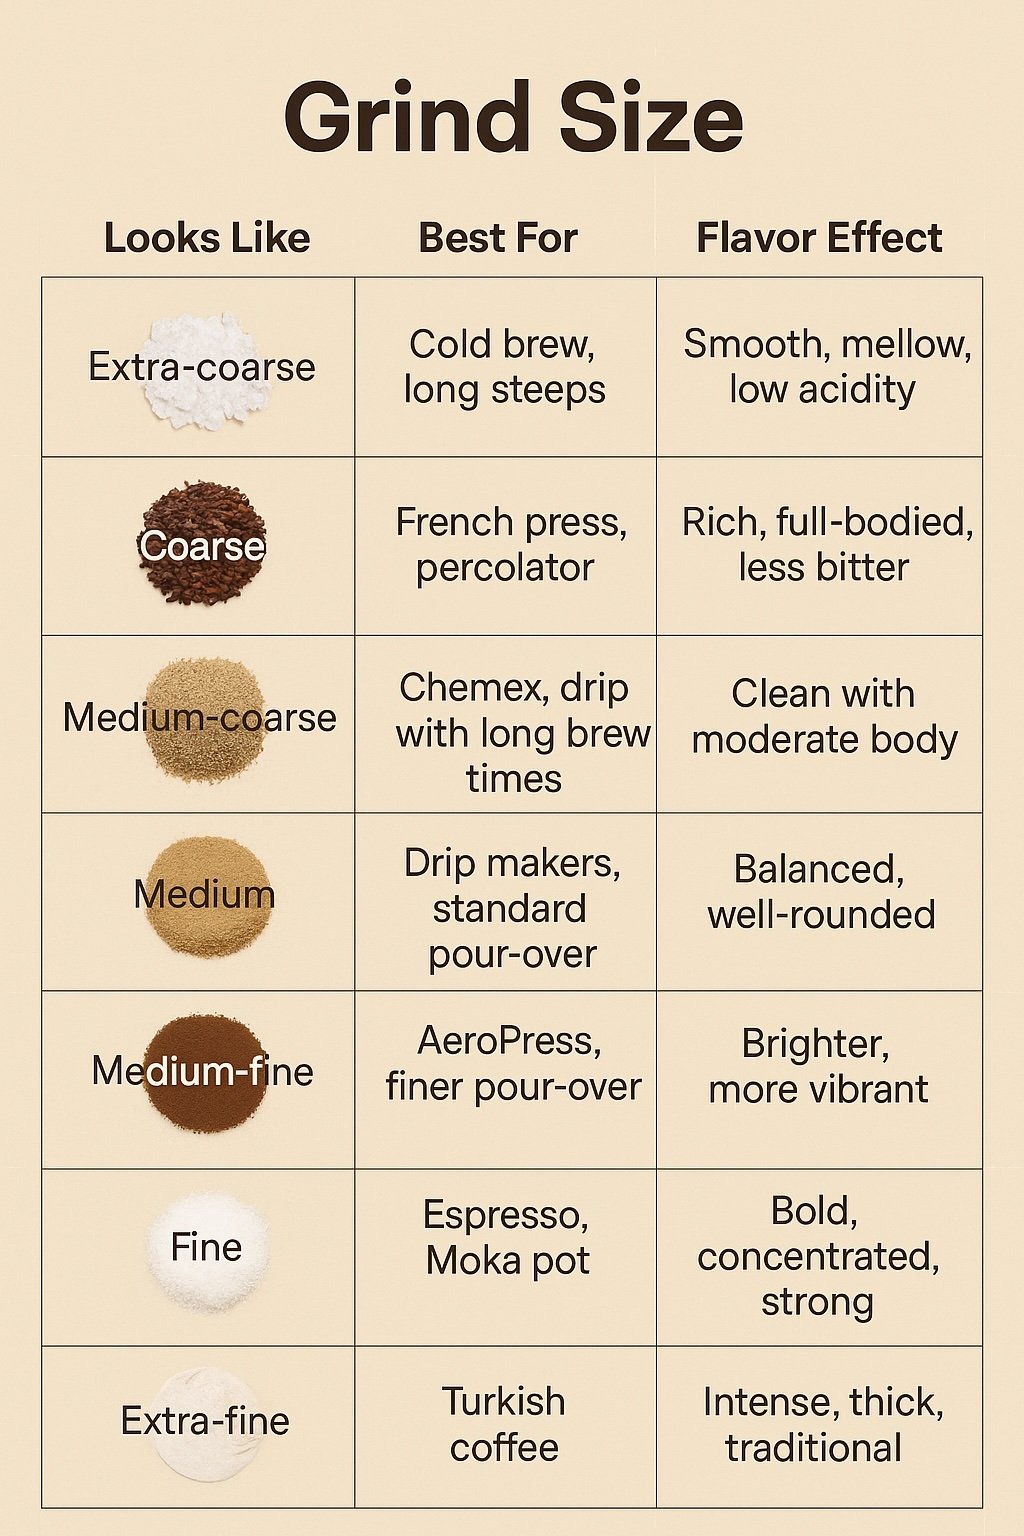
Cloudiness typically indicates grind size issues—your grounds are too fine, allowing particles to bypass the filter. Switch to a coarser setting and verify with the “pinch test”: properly ground coffee should crumble easily between fingers without forming clumps. If your brew tastes weak despite correct ratios, check for “channeling” where water creates paths through unevenly distributed grounds. Fix this by stirring grounds gently after adding water to create an even “bloom.”
Bitterness usually stems from over-extraction caused by excessive brew time or warm temperatures. If your refrigerator runs above 40°F (4°C), reduce brew time by 4-hour increments until bitterness subsides. For persistent sourness, increase coffee quantity by 10% rather than extending brew time, which would introduce new extraction problems. If sediment accumulates in your carafe, inspect the filter basket for microscopic tears—replace it if you notice any damage to maintain optimal filtration.
Maintenance Protocol for Longevity
Daily cleaning prevents flavor contamination and extends your machine’s lifespan. Disassemble all components immediately after use—never let dried coffee grounds adhere to surfaces. Wash the carafe and filter basket with warm water and mild dish soap using a soft sponge; avoid abrasive cleaners that scratch surfaces and trap coffee oils. The brew basket lid requires special attention—remove the silicone gasket weekly to clean trapped residue that causes leaks.
Monthly deep cleaning prevents mineral buildup: fill the carafe with equal parts white vinegar and cold water, let it sit for 30 minutes, then rinse thoroughly with 3-4 water cycles. Check seals for wear every three months, replacing them if they no longer create an airtight seal—compromised seals cause inconsistent extraction. Store components disassembled with the carafe inverted on a drying rack to prevent moisture retention that breeds mold.
Flavor Enhancement Strategies
Elevate your cold brew with professional techniques: add 1/4 teaspoon of salt per 8 ounces to reduce perceived bitterness without adding calories. Cold brew with cinnamon sticks or vanilla beans during the steeping process for infused flavors—avoid oils that coat grounds and inhibit extraction. For layered drinks, create a “coffee reduction” by simmering 4 ounces of cold brew until reduced by half, producing a syrupy espresso-like concentrate for drizzling.
Experiment with water chemistry—add a pinch of baking soda to neutralize acidity in darker roasts, or use magnesium-enhanced water for brighter single-origin beans. Store brewed concentrate in mason jars with oxygen absorbers to extend freshness from 14 to 21 days. When serving, use a spoon to layer ingredients: pour over the back of a spoon to create distinct strata in coffee cocktails. Track your experiments in a dedicated notebook to replicate successful combinations and refine your personal brewing signature.


